%20copy.png)
If you have your Wisephone and are excited to get started, you're in the perfect place! Below, you'll discover a handy step-by-step checklist arranged just right to help you avoid any delays or hiccups along the way.
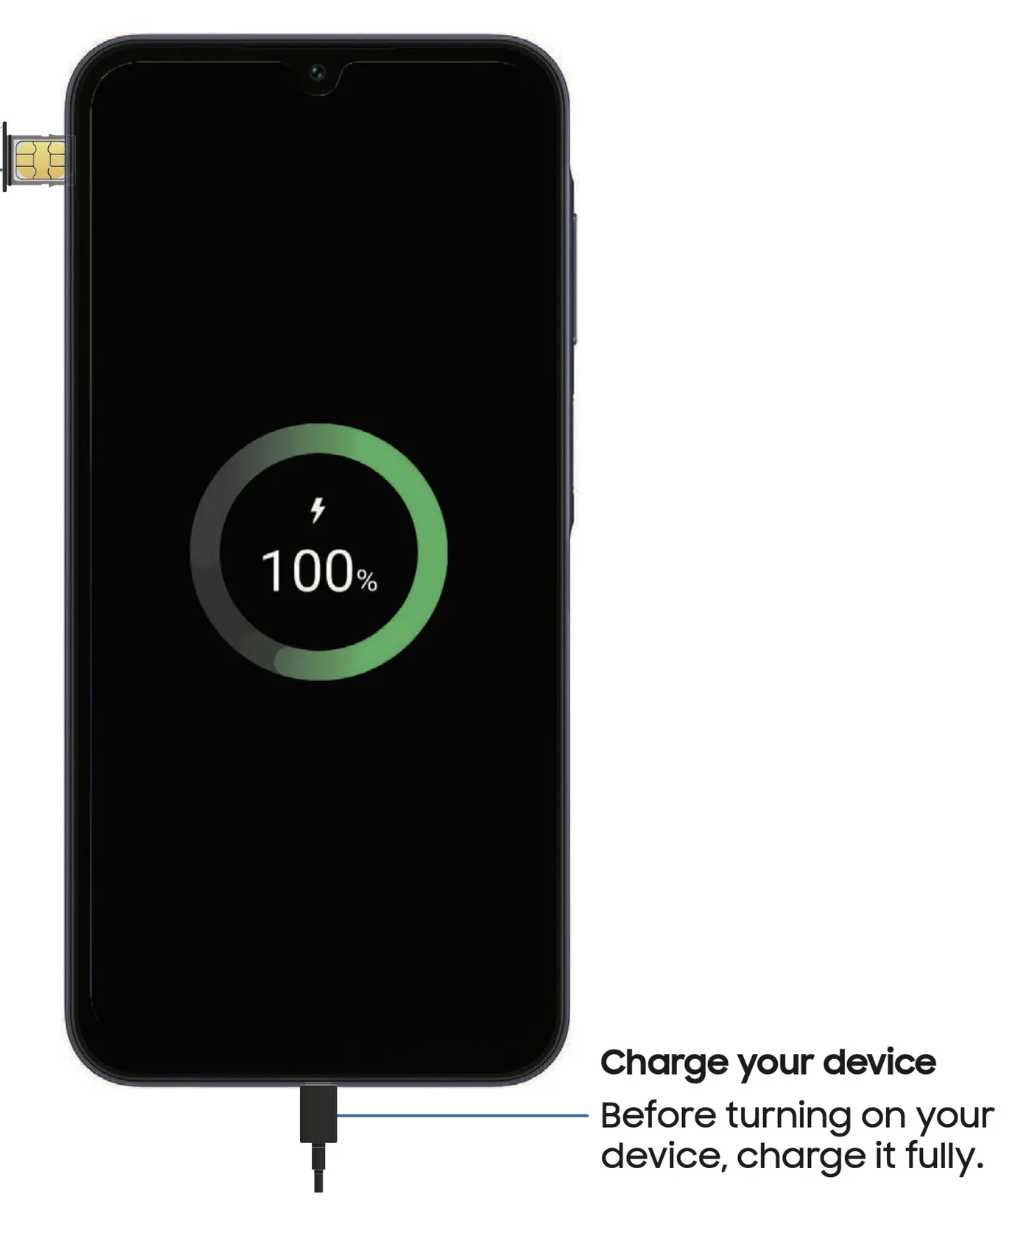
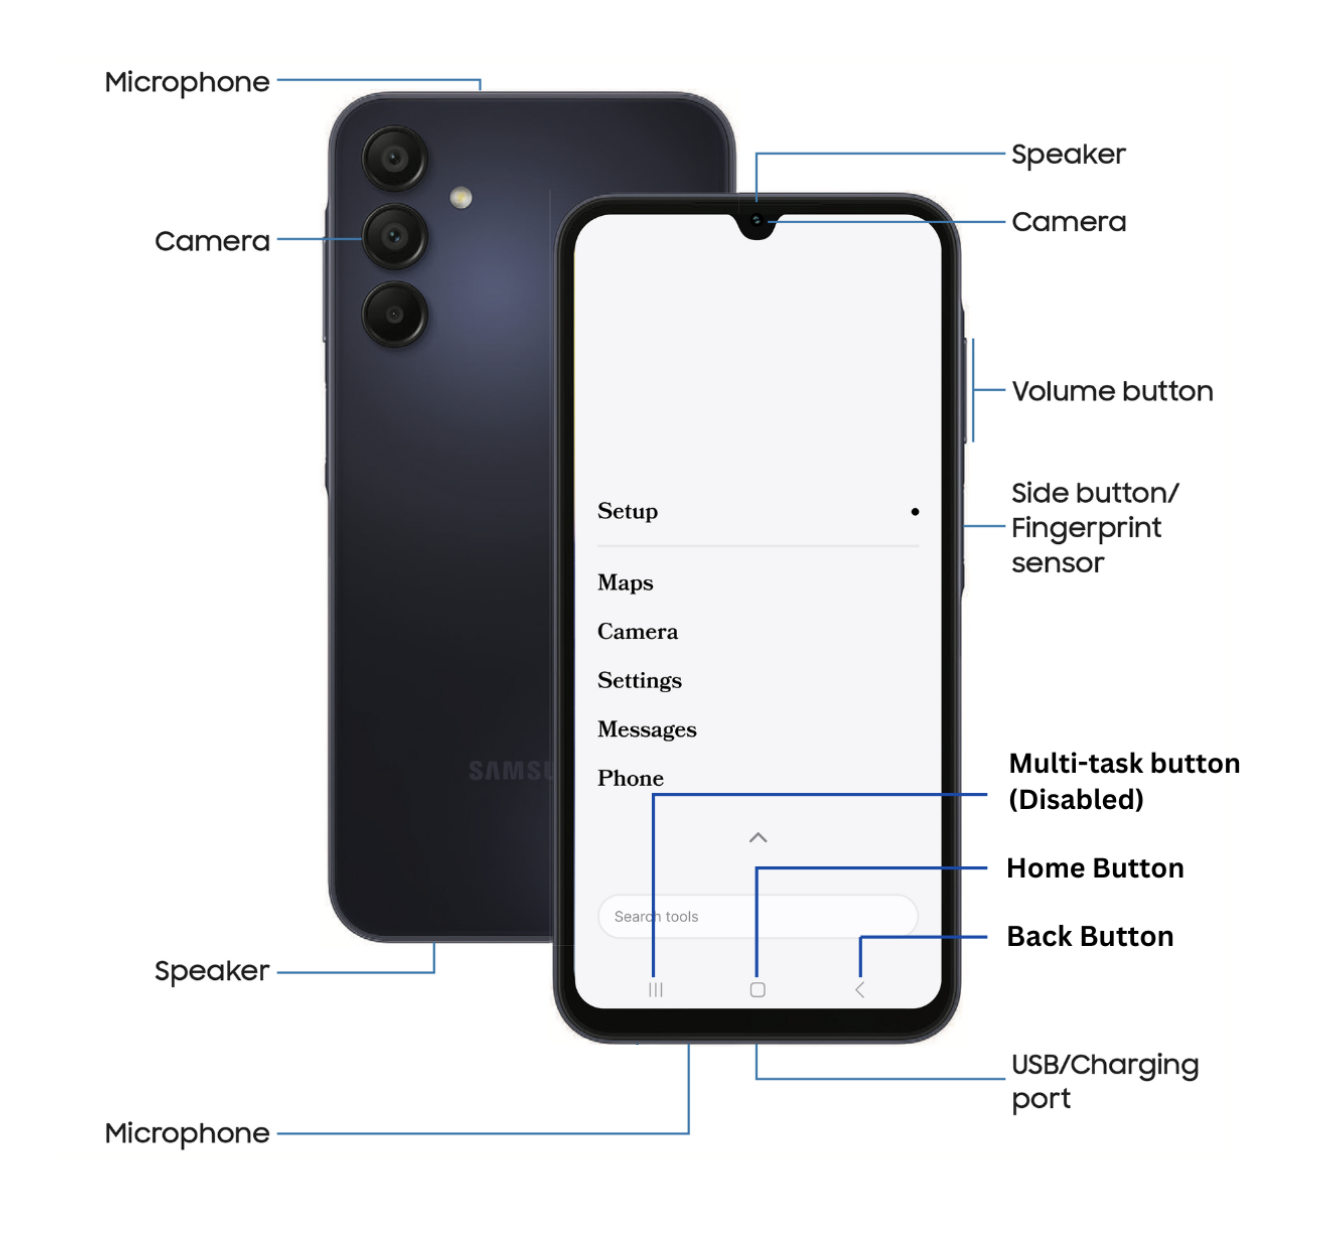
Begin by gently unpacking your Wisephone and pressing and holding the side button (see image below to locate power button) to switch on your device. Then, connect your device to WiFi (see step 2).
Unlock your screen by swiping up, then tap Setup, then Open Wi-Fi Settings to toggle on and select your network.
If Wi‑Fi isn’t available and you need to activate or transfer an eSIM, swipe down from the top right to open Quick Settings, then tap the gear icon. Go to Connections → SIM Manager → Add eSIM, and choose the option that fits your needs. When you’re done, return to the home screen, tap Setup, and select Use cellular data (note: this step will use mobile data).
Note: Devices ship with the latest firmware and software, but if it’s been a while since the device last connected to a network, updates may begin installing. During this time, the device may feel temporarily slower – it will pass once installation is finished.
QUICK TIP: Adjust your screen timeout setting to prevent interruptions. Swipe down from the top right to open Quick Settings, then tap the gear icon. Go to Display → Screen timeout → choose a longer time → return to home screen.
A. Tap "Setup" on the home screen
• Select Get Started → Verify age
• Choose "Sign up" to create your new Wisephone portal account.
• Enter the name, email, and phone number of the account owner–this can be you or a trusted person (such as a parent or accountability partner) who will manage the device
Note: The account created here becomes the device manager for all connected devices. You can update the manager’s phone number later by tapping "☰" in the top-right corner and editing the account details.Learn more about the Portal HERE
B. SMS Authentication • Enter the verification code sent to your phone number to confirm your account • Tap Get Started to attach your device(s)
C. Enter the following:
• Wisephone IMEI (located at the bottom of your tube)
• Phone number (E.g., no number yet = 123-456-7890 – update later if needed)
• Give it a name
• Done – this Wisephone is now linked to your account.
Note: To reopen the plan selection pop-up, tap “Activate Plan” next to the appropriate device.
D. Subscription Activation
• Select either Annual or Monthly plan
E. Complete Device Setup
• You’re already on the Devices page — just tap Manage Device to continue
• Open the Features tab to turn on the features you want.
Note: When you turn on Tool Drawer, a new tab called “Tool Management” will appear. It lets you browse and search approved third-party apps if you prefer not to have direct Tool Drawer access on your device. It may take a moment for toggled features to load on your device.
(skip if set up during step 2)
• Swipe down from the top right to open Quick Settings
• Tap the gear icon → Connections → SIM Manager → Add eSIM
• Choose the option that fits your needs. You can follow the steps in this guide to activate eSIM. If your cellular service isn’t connecting properly, check the troubleshooting steps HERE.
• Open your Phone tool
• Select the “Keypad” option at the bottom
• Dial 1 → tap the “ “ button
• Set a password and record your voicebox message
If you are switching from another phone:
• iPhone users should disable iMessage (Article HERE) This helps ensure messages are delivered correctly.
Move important data such as:
• Contacts
• Photos
• Other key dataThis guide will walk you through the step-by-step process of transferring essential data to your Wisephone.
To answer calls, press and hold the call button, then swipe left or right. For a helpful guide, check out this visual HERE.
Instead of traditional app icons, we offer a unique customization setting that lets you rearrange the order and choose which Tools you want to pin. Click HERE to learn how!
Third-Party apps can be installed using the Wisephone Portal. The portal can be accessed by accessing settings from the home page.
Settings → Wisephone Portal → Login → Manage Device → Tool Management
In Tool Management you can search for new apps manage the apps you currently have installed.
For more information check out our video on the Wisephone Portal.
Learn how your device works:
• Press the “<” (back button) to close tools
• Optimize performance in Settings → Device Care → Optimize Now
• Adjust data usage limits and billing cycle if needed – learn more HERE
• Set your side button to open the power menu:
Settings → System Settings → Advanced Features → Side Button
→ Long Press → Power off menu
You can also access the power menu by swiping down from the top-right and tapping the power icon.
Your Wisephone is now ready to use with your C-Spire service.If you run into issues:
• Restart your device
• Check your SIM card
• Contact your carrier for network-related problems
• Search the wisephone help articles HERE
Still need help?
If something isn’t working as expected or you’re running into a software issue, our Wisephone Support team is ready to assist you. Call/text 512-675-1820 or email hi@wisephone.com

© Copyright Techless. 2026
